
Cabinet painting is one of those home improvement projects that looks easy but can actually be quite challenging. As a homeowner, it seems simple enough to handle on your own, saving you significantly in the process. Yet, when you’re knee-deep in primer and paint, sorting through unlabeled pieces of hardware, and several weeks behind schedule, “easy” is the last word that comes to mind.
That’s where professional kitchen cabinet painters come in. When you hire an experienced painter to tackle your cabinet painting job, you’ll not only enjoy smooth, durable, flawless results but a process that is so much easier and less stressful for you.
However, if you’re still considering handling the job on your own, rather than hiring professional kitchen cabinet painters, here are some pro tips and tricks to keep in mind.
Pro Painter Tip #1: Get Inspired with a Kitchen Cabinet Look You Love – and Personalize It
The perfect color scheme can transform a drab and uninspiring kitchen into a bold room that makes a distinctive statement. However, selecting the right cabinet colors can often feel like an overwhelming challenge; even more so after spending hours scrolling through ideas on Pinterest and Instagram. It’s hard to find an online design that will fit with the rest of your kitchen and home.
Here’s a secret that professional kitchen cabinet painters know. You don’t have to reinvent the wheel when it comes to choosing colors and styles. Borrowing inspiration from existing designs is a smart way to start.
If you come across a color combination that resonates with you, use it as a foundation. Look at the main colors, complementary shades, and accents that make the aesthetic work. From there, adapt it to fit your kitchen and preferences.
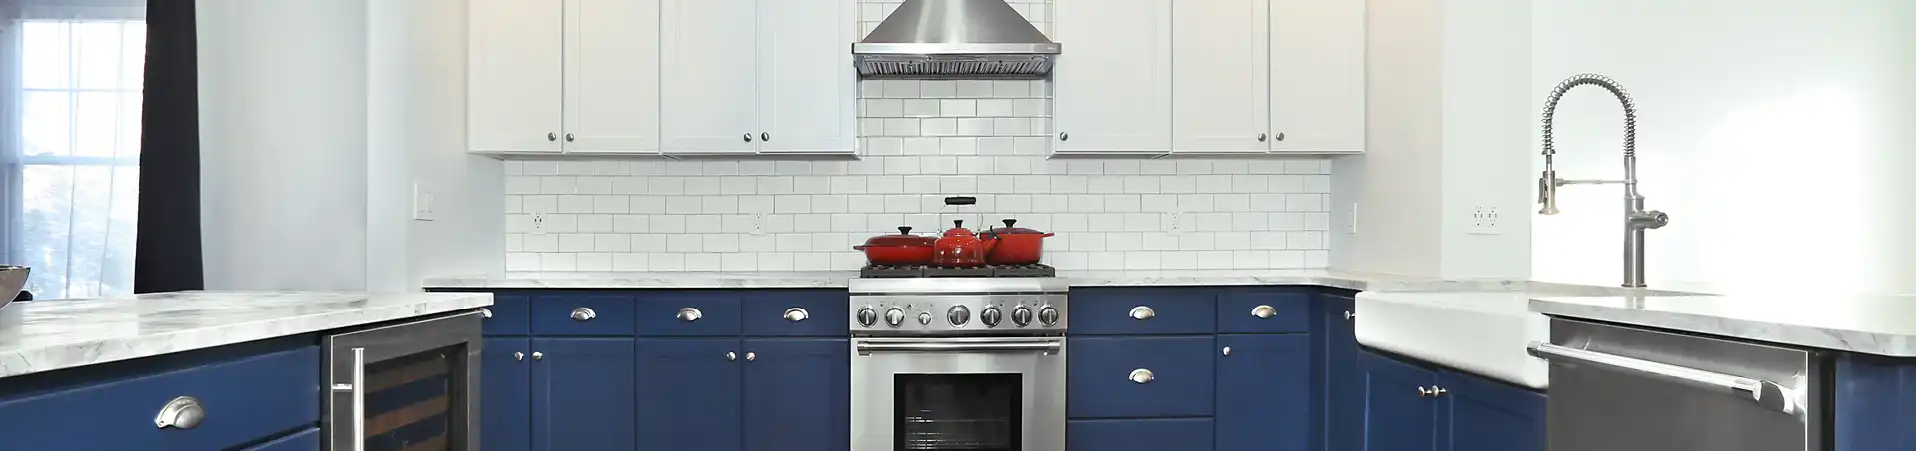
For instance, if you love an image of black-and-white cabinets with a high-gloss finish, but it doesn’t feel right for your kitchen, you can still create a similar vibe that’s personalized around your taste and home. Opt for two-toned black and white cabinets that are matte, not high gloss. Combine them with vibrant pops of color, like teal or mustard yellow, in the wall paint, area rugs, table linens, or window treatments. By borrowing and then personalizing a cabinet color scheme, you’ll create a kitchen that feels uniquely yours without the frustration of starting from scratch.
Pro Painter Tip #2: Choose the Right Kitchen Cabinet Painting Products
Professional painters know that painting kitchen cabinets isn’t as simple as grabbing any primer or paint off the shelf. Unlike walls, cabinets must stand up to heavy use, heat, food spills, and grease, which can cause damage to the wrong painting products.
For a long-lasting, professional finish, it’s vital to choose products specifically designed for kitchen cabinets. Some options include:
- Oil-Based Paints: Vibrant and smooth but messy to use, with strong odors and high VOC levels.
- Alkyd Paints: Durable and less messy than oil-based paints, but still emit strong fumes.
- Latex Paints: Affordable and low-odor but prone to wear and tear in high-use areas, like kitchens.
- Enamel Paints: Offers exceptional durability and a smooth finish, but is more expensive, takes longer to dry, and requires proper ventilation due to strong odors.
When selecting products, it’s also important to consider the coverage, smoothness, and vibrancy of the color. Additionally, research ease of application, odor levels, and VOC content before making a decision about which cabinet primer, paint, and topcoat to choose. While high-quality paints cost more upfront, their easy, smooth application and durability make them a worthwhile investment.
Pro Painter Tip #3: Number the Doors, Drawers & Hardware
Disassembling your cabinets is another key step if you want results that look like they were performed by a professional kitchen cabinet painter. This means removing doors, drawer fronts, and hardware, so you can paint components separately without handles, pulls, or hinges getting in the way. However, the process of reassembling everything after painting can become overwhelming if you’re not organized.
To avoid confusion and save on frustration, use a simple numbering system before you start. Draw a plan of your cabinets, assigning a unique number to each door and drawer front. As you remove each piece, label it with its corresponding number using painter’s tape or a sticky note.
At the same time, collect all the hardware for that specific piece – including hinges, screws, and pulls – and place them in a small bag or container. Label the bag with the same number as the cabinet piece. This little extra work upfront will save you hours of trial-and-error and frustration when you’re ready to reassemble.
Pro Painter Tip #4: Get Rid of Grease & Grime on Kitchen Cabinets
Over time, professional painters know that kitchen cabinets accumulate a nearly invisible layer of grease, grime, and cooking oils. Even if your cabinets look clean, these residues can linger on the surface, creating a barrier that prevents primer and paint from properly adhering. That’s why, before you break out your rollers and paintbrush, your cabinets need some serious cleaning and degreasing. Otherwise, the primer and paint won’t stick to the cabinet surface.
If grease and grime do remain on the surface, your paint job is at risk of peeling, chipping, or bubbling over time. Not only that but paint applied to an unclean surface won’t bond evenly, leading to patchy or streaky finishes. Even worse, oils left on the surface can seep through the primer and paint layers, causing discoloration or a blotchy appearance. The result? Your hard work won’t last.
To avoid this, use products like trisodium phosphate (TSP) or degreasing cleaners designed specifically for kitchen cabinet use. If you prefer a gentler option, dish soap with grease-cutting properties and warm water can work for light cleaning jobs.
Use a sponge or microfiber cloth to wash all the cabinet surfaces. Pay special attention to corners, edges, and areas near the stove where grease buildup is most common. Afterward, wipe the cabinets with a damp cloth to remove any leftover cleaner residue. Let the cabinets air-dry completely or use a clean, dry cloth to remove any moisture left behind.
Pro Painter Tip #5: Tint Kitchen Cabinet Primer for Dark Colors
Primers are typically white or light gray, which can create an issue if you plan to paint your cabinets a dark color. Without the right preparation, darker paint colors can appear streaky or uneven, with the underlying primer showing through in patches.
Tinting the primer helps avoid this by creating a base that’s closer in tone to your chosen color. This ensures a smooth, even appearance with fewer coats of paint. Besides tinting the primer, you can also purchase darker primers to apply to your kitchen cabinets before painting them.
With that said, if you choose to tint your primer, be careful with how much tinting is used. Too much, and the primer will lose its bonding power. The right amount, however, can save you one or two coats of cabinet painting.
For the best results when tinting primer, ask for guidance at the store. Many professional kitchen cabinet painters recommend tinting the primer to a shade that is approximately 50% lighter than the final color. This provides great coverage while still maintaining excellent surface adhesion.
Pro Painter Tip #6: Create a Kitchen Cabinet Painting & Drying Station
Setting up a proper painting and drying station is critical for the success of your cabinet painting project. Without one, you’ll find yourself constantly improvising and struggling to keep your work organized. By creating a dedicated space, you’ll have the room you need to paint and dry each component effectively, saving time and ensuring a professional-quality finish. To set up your station:
- Choose a location: If weather permits, an outdoor area like a garage, carport, or patio is ideal. It offers ventilation and keeps paint fumes out of your home.
- Prepare a work surface: Use a sturdy table, saw horses with a wooden plank, or any flat, stable surface as your prep and painting station.
- Set up a drying rack: Use a series of painter’s pyramids, allowing air to circulate around your kitchen cabinets for faster and more even drying.
- Organize the space: Place all your tools, paint products, and cleaning supplies within easy reach.
- Make sure there’s proper ventilation: If you’re working indoors, use fans or open windows to maintain airflow. For outdoor workspaces, place your station in an area without direct wind or excessive dust.
- Add lighting: Make sure your station is well-lit so it’s easy to see any uneven paint application or drips.
Pro Painter Tip #7: Set Up a Temporary Kitchen
Unless you plan to eat out for every meal (and deal with the cost and inconvenience), setting up a temporary kitchen is a must. The good news is that with a little planning, you can create a functional space to store and prepare meals during your kitchen cabinet renovation.
Consider areas like a dining room, garage, laundry room, or even a corner of your living room. Pick a spot with access to outlets for small appliances, or one near a bathroom so you’ll have a sink and water supply nearby.
Gather essentials for meal prep, starting with a microwave, toaster oven, hot plate, or portable burner. An outdoor grill is a great backup option. Cooling is also critical, which is where a mini fridge or cooler with ice packs comes in. Also, don’t forget about disposable plates, bowls, cups, and utensils, as well as dry goods like cereal, bread, and snacks.
Once you have your supplies, set up your workspace. Designate areas for prepping, cooking, and cleaning to make your workflow easier. Also, plan meals that are simple to make and clean up after, such as sandwiches, salads, or frozen meals.
Pro Painter Tip #8: Take the Easy Approach to Kitchen Cabinet Painting
DIY cabinet painting can be a time-consuming and frustrating process, often requiring multiple coats, meticulous prep work, and days of drying time. With kitchen cabinet painters from your local N-Hance®, you’ll enjoy a hassle-free experience and stunning, long-lasting results that elevate your kitchen’s style and functionality. Here’s what sets us apart:
Durable Kitchen Cabinet Painting Designed to Last
N-Hance primers, paints, and topcoats are specifically designed to meet the unique challenges of kitchen environments. Unlike traditional cabinet paints, which can chip or degrade over time, our finishes are formulated to resist damage from cooking oils, grease, moisture, and high heat. This ensures your cabinets maintain a fresh, flawless look, even with daily use.
A Custom Look That Captures Your Style and Personality
Our kitchen cabinet painters can apply a full spectrum of cabinet paint colors, allowing you to get the exact look and feel you want for your kitchen. From timeless neutrals to bold, modern shades, we will help you create a space that reflects your distinct style. To further personalize your kitchen cabinets, we also offer specialty finishes, such as glazed or distressed looks, that infuse more character and depth into your cabinets and your whole kitchen.
Fast, Eco-Friendly, Convenient Services
One of the standout advantages of hiring kitchen cabinet painters from N-Hance is our Lightspeed® Nano technology. This innovative process uses UV light to cure finishes instantly, meaning your cabinets are ready for use as soon as we’re done. No waiting days or weeks for paint to dry and harden.
Our finishes are also low in volatile organic compounds (VOCs), so you won’t have to deal with strong odors or harmful fumes during or after the project. This means our cabinet painting services are better for the environment.
Leave the Hard Work to Our Experienced Kitchen Cabinet Painters!
From surface preparation to flawless finishes, our professional kitchen cabinet painters will handle every detail of your project with skill and expertise. By choosing N-Hance, you’ll also save yourself the effort and frustration of a DIY project while enjoying professional-grade results that bring your dream kitchen to life.
Contact your local N-Hance at (855) 642-6230 today to request a FREE estimate and find out why our professional kitchen cabinet painters are the right choice for beautiful, durable results.