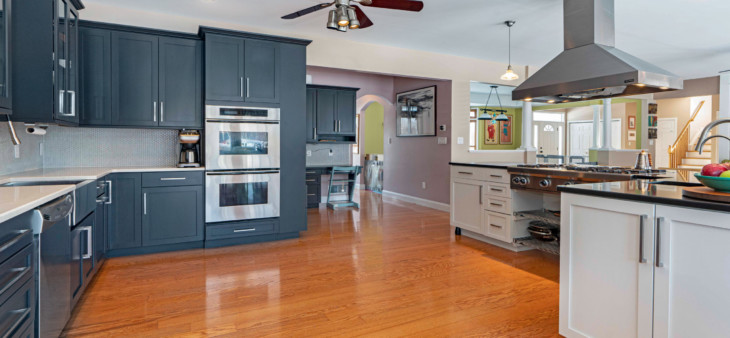
Your kitchen is your haven and the heart of your home. Yet, if your cabinets are dated, worn out, or beat up, it’s time for a change. Painting your kitchen cabinets not only refreshes them but revitalizes the whole space. Add in some different artwork, an area rug, and table linens, and the room will feel brand new.
If, however, you’ve never painted kitchen cabinets before, it’s hard to know where to begin. To help you get started, below is an overview of the process you’ll need to follow once you’ve made a decision about the paint color.
Step 1: Empty Your Cabinets
To begin, empty your cabinets and clear off the counters. Also, cover and tape off the floors, appliances, countertops, nearby walls, and furniture, so these items are not damaged by paint splatter. Use plastic sheeting taped to the doorways to protect the rest of your home from dust and fumes.
Step 2: Create a Short-Term Kitchen
Don’t forget to create a temporary kitchen space for your family. Get a cooler to store perishable items and place a microwave in your dining room or another space in your home.
Bring in snacks and any other items you use regularly. Invest in paper products, like plates and napkins, as well as disposable utensils for the duration of the project.
Step 3: Set Up a Painting Workshop
Next, you’ll need to create a workspace for priming, sanding, and painting, ideally in your garage or somewhere with plenty of ventilation. Set up sawhorses and worktables and make sure you have all the supplies you need handy before you begin the project.
Keep in mind that the basement is not an ideal space for cabinet painting, even if you have windows or outdoor access. The fumes associated with painting can get into your HVAC system and be transferred throughout your house if you paint in the basement.
Step 4: Remove Drawer Fronts and Doors
Work from top to bottom and left to right as you remove the cabinet doors and drawer fronts. Be sure to number or mark each one, so you know where they go when you’re ready to install them back in place. Also, keep the hardware organized and stored in numbered baggies.
Step 5: Clean All Surfaces
Clean all the surfaces, including the boxes, doors, and drawer fronts, before priming them. Use a degreasing product to remove any oil, fingerprints, grime, and splatter. Rinse the surfaces with water and then wipe them thoroughly to ensure they are completely dry before priming. For the boxes, make sure you vacuum out the interior.
Step 6: Prime the Boxes and Cabinet Surfaces
Regardless of whether the original paint color is dark or light, prime the surface. Primer does more than cover up old paint or stain. It also provides an ideal surface for the new paint to adhere to, so the finish is more durable and longer lasting. Use a roller for the larger surfaces and a paintbrush to get into tighter spots and corners.
Step 7: Repair and Sand
Once the primer is dried, any areas that are damaged will need to be repaired. Look for cracks, crevices, or other areas of damage and use wood filler to correct those areas.
You’ll need to smooth out the wood filler with a putty knife and let it try. The next step is to sand the surface with medium-grit sandpaper. Once sanding is complete, vacuum and wipe down the surfaces to remove all the grit.
Step 8: Paint Your Kitchen Cabinets
It’s finally time to paint your kitchen cabinets. It’s best to use a sprayer for a smooth finish that looks professional. Depending on the previous color, you might need to apply two or three coats of paint.
After the first coat of paint is dry, lightly sand the surface before applying the second coat. In between painting sessions, cover your brushes and rollers with plastic bags and place them in the refrigerator to stop them from drying out.
Step 9: Allow for Sufficient Drying Time
Give your cabinets enough time to dry, which can often take a few days. If you rush the process, you’ll end up with smudge marks and a lot of touch-up work.
Step 10: Put It All Back Together
Now that the hard work is done, you’ll need to carefully reattach all the door hinges and drawer fronts. Be careful that you are following your numbering system and work slowly so as not to accidentally chip the new paint.
Call Our Team Instead and Let Us Handle the Process
Painting your kitchen cabinets on your own requires a lot of time, energy, and work. Even when you’re done, you might not get the expert outcome you want.
The good news? You can avoid all these steps by hiring the kitchen cabinet painting professionals at N-Hance®. All you have to do is select your color, hardware, and any other options, like finishing techniques or cabinet storage solutions. We’ll handle the rest, start to finish! In just a matter of days, you can have a kitchen that looks new.
Ready for help painting your kitchen cabinets? Reach out to the cabinet makeover specialists at N-Hance. We can transform your cabinets quickly and affordably in a way you will love. Call (855) 642-6230 for a free consultation and quote.


