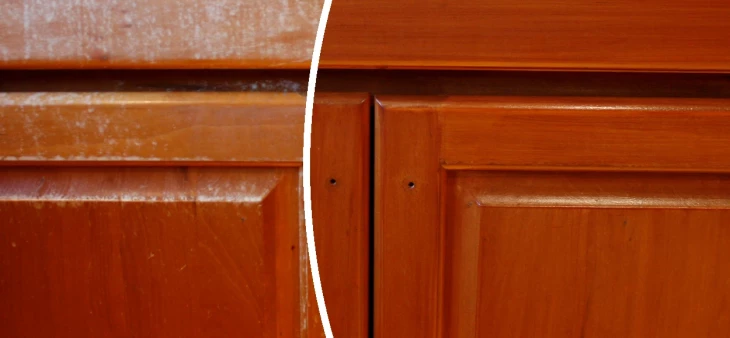
Ready to kick scuffed, worn out, or discolored cabinets to the curb?
Refinishing is an affordable way to take drab cabinets and restore their beauty and luster. However, before you get started, you’ll need to know how to refinish your kitchen cabinets. Here’s a look at what the process entails.
Step 1 Prepare Ahead of Time.
Before you begin, prep the space and gather your supplies. This includes making sure you’ll be working in a well-ventilated area. Since refinishing can create dust particles and harmful fumes, you’ll want to be in an area with open windows and a fan that keeps the air circulating. Also, wear a respirator during sanding and refinishing, so you don’t inhale any dangerous airborne substances.
Another step in the how-to process is to shop for the cabinet refinishing supplies you’ll need. This includes:
- A degreasing cleaning solution
- An orbital sander, sandpaper of varying grit, and a sanding block
- Wood filler to repair any holes or scratches, along with putty and a scraper
- Respirator and protective gloves
- Tack cloth
- Paint brushes and soft cloth rags
- Paint stripper
- Wood sealer
- Paint thinner
- Stain
- Varnish
Step 2 Remove the Doors & Drawer Fronts.
Once you have everything you need to handle refinishing your kitchen cabinets, including a workspace that is set up and ventilated, you can remove the cabinet doors and drawer fronts. Take off all the hardware and make sure you are labeling everything as you go, so you’re not left wondering how to re-hang your newly refinished kitchen cabinets. It often helps to draw out a map of your kitchen labeling each door and drawer front with the same number as you tag the actual item with.
Step 3 Strip Off the Old Finish.
Use a paint stripper to remove the finish on your cabinets. If there are stains, you might need to use some chlorine bleach to remove them. This part of the process often requires a lot of effort and patience.
Not all the finish will lift off with the first application, requiring some serious elbow grease. Make sure you are wearing protective gloves and a long-sleeve shirt as you’re working through this step of the cabinet refinishing process.
Step 4 Repair Damaged Areas.
Once all the old finish is removed, repair areas with scratches, dents, gouges, and other imperfections. Use wood filler to fix them, then sand them thoroughly so they are smooth. You can use your orbital sander for the first pass and then sandpaper after that. You’ll then need to make sure that all the wood dust created is removed from the surface and any ridges, corners or joints.
Step 5 Apply a Sealer.
It’s important to seal your cabinets before staining them. This helps to protect the surface of the cabinet, so as you’re refinishing, the new stain goes on smoothly and evenly. Once the sealer is completely dry, wipe the surface down with a tack cloth to ensure you have a smooth surface.
Step 6 Stain Your Cabinets.
Now’s the time to stain your cabinets with the color you choose. Apply it using a soft rag or a brush, or a combination of both. You might want to experiment in a small area on the backside of one of the cabinet doors first to see which technique works best.
Step 7 Apply a Final Protective Seal.
Once the stain is thoroughly dried, protect the final coat with a clear polyurethane varnish. Before you do, wipe down your cabinets with the tack cloth again to ensure surfaces are free from any dust. Make sure you read the directions on the kitchen cabinet varnish and know how to follow them, so you get the right results.
Want to Skip the Hassle of Wondering How to Refinish Kitchen Cabinets & Just Hire a Professional?
Call N-Hance®. We perform our refinishing process with state-of-the-art methods and technologies. Our products are also designed for cabinets and therefore more durable. In fact, with our approach, your kitchen cabinets will look fully restored and brand new.
Our process is also far faster than a DIY approach. With our Lightspeed® system, we can cure your cabinets in seconds, rather than waiting days for your new finish to dry. This means a quicker turnaround time and a more durable cabinet finish. We can achieve a matte, satin, semi-gloss, or gloss finish; all of which are highly rated for resistance to scratches, scuffs, and long-term wear.
To get started, all you have to do is take one simple step – call N-Hance – and we can handle all the details of your project. We’ll answer your questions, explore your options, and help you make decisions that will give you a final result you can love for years to come. We will completely transform your cabinets in a matter of days, not weeks, with surfaces that are 100% ready to use once we leave.


